
Setup the HirePOS-Managed Xero Connection
HirePOS now provides a new managed Xero connection that simplifies the process of exporting transactions from HirePOS to Xero.
With the HirePOS-managed connection, you no longer need to:
Create or maintain your own Xero API keys.
Log in to Xero and approve access each time you open the Xero Exporter.
The new connection also increases the available Xero API request allowance from 1,000 requests per day to 5,000 requests per day.
Beta feature: The HirePOS-managed Xero connection is currently available to selected customers for Beta testing.
Request access to the Beta
To request access:
In HirePOS, go to Help > Get Support or Help > Contact Us.
Ask HirePOS Support to enable the new HirePOS-managed Xero connection Beta for your account.
Wait for HirePOS Support to confirm that the Beta connection has been enabled.
Check your accounting settings
After HirePOS Support confirms that access has been enabled:
Go to Setup > Preferences > Accounting.
Ensure Xero is selected as your accounting software.
Locate the following section:
Xero
HirePOS-managed Xero integration (Beta)Click Manage Xero Connection.
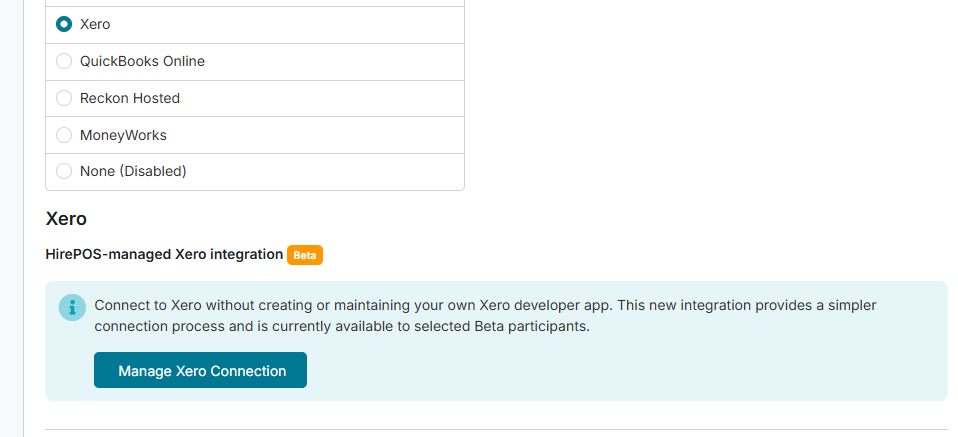
If this section or button is not displayed, contact HirePOS Support to confirm that the Beta has been enabled for your account.
Connect HirePOS to Xero
The Manage Xero Connection button will take you to the Xero Integration page.
Click Connect to Xero.
Log in to Xero if you are not already signed in.
Select the Xero organisation you want to connect, if prompted.
Review the access request and click Allow access.
You will then be returned to the Xero Integration page.
A Xero connected notification should be displayed, along with the name of the connected Xero organisation.
Only one Xero organisation can be connected to each HirePOS database at a time.
Open the Xero Exporter
After the connection has been established, you can open the Xero Exporter using any of the following methods.
From the top menu
Hover your mouse over the Home icon near the top-left of HirePOS, next to the HP icon.
Click Xero at the bottom of the Home menu.
From the Home or Reminders screen
You can also launch the Xero Exporter from the available Xero option on the:
Home screen.
Reminders screen.
During the Beta period, the Xero Exporter will open on the following Beta site:
https://hirepos-xero2-beta.azurewebsites.net/
Using the Xero Exporter
Once connected, you can use the Xero Exporter to export supported transactions, including:
Customer invoices and credit notes.
Customer payments.
Purchase orders or purchase bills, depending on your HirePOS settings.
You should no longer be asked to approve the Xero connection each time you launch the exporter.
Reconnect to Xero
You may need to reconnect if:
Access to HirePOS has been removed from within Xero.
Your Xero organisation or user permissions have changed.
HirePOS displays a message indicating that the Xero connection is no longer valid.
To reconnect:
Go to Setup > Preferences > Accounting.
Click Manage Xero Connection.
Click Reconnect to Xero.
Log in and approve access when prompted.
Confirm that the correct Xero organisation is displayed after reconnecting.
Disconnect from Xero
To remove the connection:
Go to Setup > Preferences > Accounting.
Click Manage Xero Connection.
Click Disconnect.
Confirm that you want to disconnect the Xero organisation.
Disconnecting prevents further exports until a new Xero connection is established. It does not delete transactions that have already been exported to Xero.
Beta testing feedback
As this connection is currently in Beta, please report any unexpected behaviour to HirePOS Support.
When reporting an issue, include:
The transaction type being exported.
The affected invoice, payment or purchase order number.
The error message displayed.
The name of the connected Xero organisation.
A screenshot, where possible.
Go to Help > Get Support or Help > Contact Us to submit your feedback.
Do not include Xero passwords, authentication tokens or other sensitive login information in your support request.